Follow These 5 Steps to Remove Press-On Nails In a Flash
Press-on nails are a great way to achieve a professional-looking manicure in minutes. Whenever I’m in a rush and don’t have time to get a manicure, they literally save the day! The only downside is that removing press-on nails can be a struggle.
If like me, you love press-on nails but find the removal process a bit of a challenge, we’re here to help. Below, we asked celebrity manicurists and KISS Nails brand ambassador, Gina Edwards, to share tips on how to remove press-on nails easily, without damaging your natural nails.
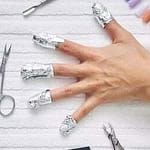
Step 1: Soak Your Nails
“If you used nail glue to apply your press-on nails, you’ll want to soak them in an acetone-based nail polish remover mixed with a little baby oil, to prevent dry skin,” says Edwards. “Soak them for about five minutes and check them regularly.”
On the flip side, if your press-on nails have a sticky adhesive backing, it’s best to soak your nails in a bowl of warm soapy water before removing them, this will help to loosen the adhesive. To start, pour warm water into a bowl and add a few drops of hand soap. Then place your fingertips in the water and let your nails soak for about 10 minutes.
Step 2: Apply Cuticle Oil In Nails
To help loosen the press-on nails and moisturize your natural nails, apply a few drops of cuticle oil to the areas just under the press-on and let the oil soak in. After a few minutes, check the nails to see if they are loose enough to take off.

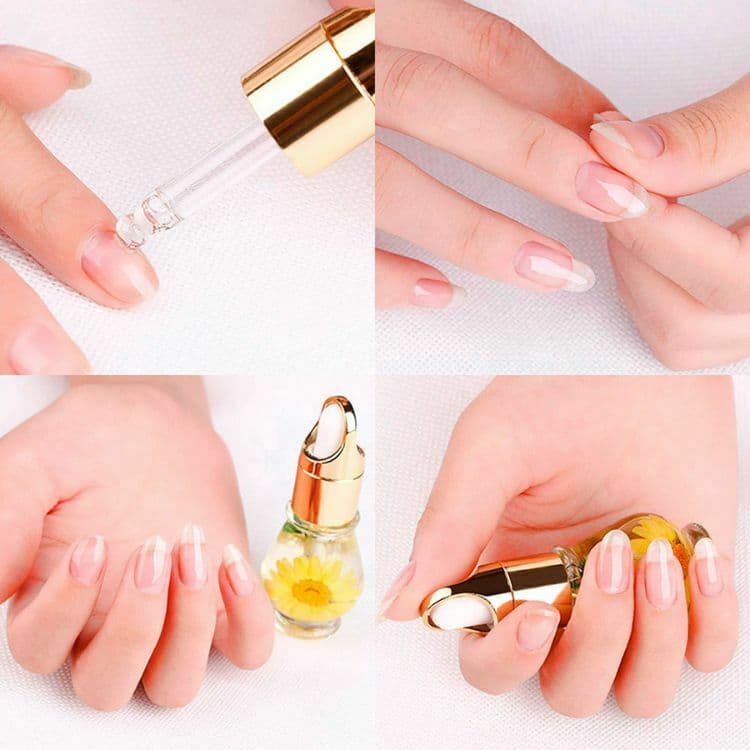
“Avoid prying off the nails before they are ready,” says Edwards. “You’ll know it’s time to remove them if you feel a light release between the press-on and your nail bed.”
Step 3: Use an Orangewood Stick to Loosen the Press-On Nails
“Slowly take an orangewood stick or KISS Glue Off around the edges of the press-on nails to loosen them,” says Edwards. “KISS Glue Off is a favorite of mine, it has an applicator tip that helps to remove press-on nails effectively.”
Make sure you take your time and have patience. “Work softly and slowly, this will help to prevent damage,” explains the manicurist.
Step 4: Peel Off Any Leftover Adhesive On Nails
Once you’ve removed the press-on nails, use an orangewood stick to gently peel off any adhesive, then apply nail polish remover on a cotton ball to remove any sticky remains.
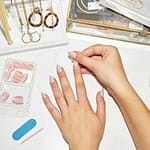
Step 5: Give Your Nails Some TLC
After you’ve removed your press-on nails, you’ll want to give your natural nails a little TLC. “Push back your cuticles and use a 240 grit buffer to lightly smooth the surface of your nail,” says Edwards. “A good hand mask does wonders as well — add your favorite natural oil so it all soaks in.”
Related: How To Remove Press-On Nails Without Damaging Your Real Nails
NOTE
Why I Remove Press-On Nails?
Press-on nails can be removed for various reasons, such as:
Damaged or worn-out nails: Over time, press-on nails may become damaged or worn out and need to be removed.
New design: If you want to switch to a new nail design, the old press-on nails need to be removed first.
Allergic reactions: Some individuals may develop an allergic reaction to the adhesive used to attach the press-on nails. In such cases, removing the nails is necessary.
Natural nail growth: As your natural nails grow, the press-on nails may become loose and need to be removed and replaced.
Regardless of the reason, press-on nails can be removed by gently peeling them off starting from the edges, or by using a solvent such as acetone to dissolve the adhesive.
Pros & Corns You Should Always Keep In Mind
Pros
The pros of using press-on nails include:
Easy to apply: Press-on nails are easy to apply at home, without the need for professional help.
Quick and easy to change: You can change your nail design quickly and easily by simply removing the old press-on nails and applying new ones.
Variety of designs: Press-on nails come in a wide range of designs, colors, and shapes, allowing you to easily switch up your look.
Cost-effective: Compared to professional salon treatments, press-on nails are a more cost-effective alternative for achieving a polished look.
No damage to natural nails: Unlike traditional nail extensions that can damage natural nails, press-on nails do not cause any harm to the natural nail bed.
Safe and hygienic: Press-on nails are a safe and hygienic alternative to traditional nail treatments as they do not require the use of UV lights or tools that can spread infection.
Convenient: Press-on nails can be removed and reapplied as needed, making them a convenient option for those with busy lifestyles.
Corns
There are several benefits of using press-on nails:
Convenience: They are easy to apply at home and save time and money compared to a trip to the nail salon.
Variety: They come in many different shapes, sizes, and designs, allowing you to choose a look that suits your style.
Affordability: Press-on nails are typically much less expensive than getting your nails done at a salon.
Customizability: You can trim them to fit your nails perfectly and create the exact look you want.
No drying time: Unlike traditional polish, there’s no waiting for press-on nails to dry.
However, it’s important to follow instructions carefully to ensure a proper and secure fit, and to remove them as directed to avoid damaging your natural nails.